Last Updated on
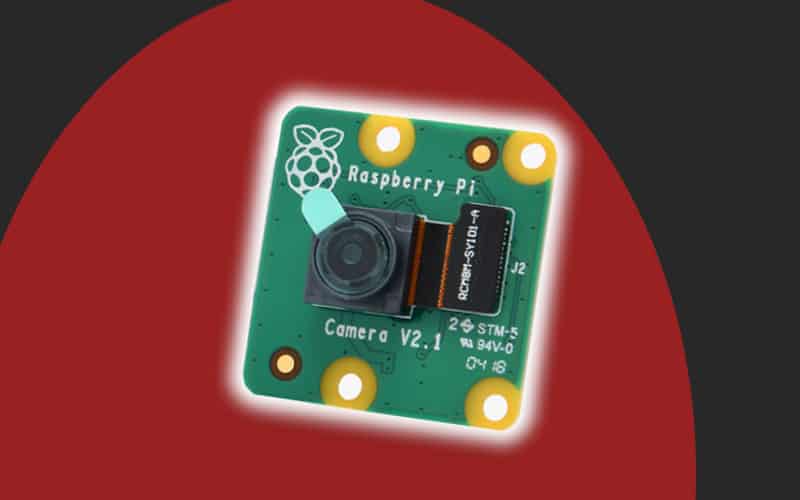
The Raspberry Pi’s camera module is great. It really is! While the quality isn’t going to blow anyone away, nor are the alternatives, it’s a really cool way to experiment or create your own security camera or even, just a fun toy to tinker with.
Installing it is relatively simple, but this won’t work on the Pi 400, as there’s no camera module slot and the Pi Zero requires its own special ribbon cable to connect. The Pi 400 can use USB Cameras in place, but they do require their own commands.
Before we start, shut down your Pi completely, as connecting the ribbon cable while it’s on will cause it to short and shut down.
Camera Set Up
Go into Preferences from the Pi’s ‘start menu’, then Configuration. Toggle the Camera option to Enabled and then press OK.
Reboot your Pi.
Doing it this way will prevent us from having to reboot the Pi a second time after installing the cable.
Python Script: Making Definitions
‘def’ in Python allows us to define what we want a specific piece of code to do by condensing it into a word, string, or letter. This way we can do a bunch of messy code things at the top of the page and then simplify it as we go down.
First, let’s define the photo capturing of our code:
def capture():
global output
output = strftime("/home/pi/Desktop/image-%d-%m %H:%M-%S.jpg", gmtime())
cam.capture(output)
print("saved")
Here, we’re telling Python that Capture is going to look at the global output that we set to blank, then replace that blank with the time and date.
cam.capture(output) tells it to then name the file that we set as output.
Finally, print is Python’s own version of repeating back what you put in, so we’ll tell it to say saved to tell the user that things are a-okay.
Next, let’s make one for capturing video:
def cap_vid():
global output
output = strftime("/home/pi/Desktop/image-%d-%m %H:%M-%S.h264", gmtime())
cam.start_preview()
cam.start_recording(output)
print("recording...")
cam.wait_recording(10)
cam.stop_recording()
cam.stop_preview
print("saved")
Same as before for global output, except now we need to call in the recording functions, so cam.start_recording will bring in that and the brackets with output tells it to use the file name we’ve set.
Obviously, we need to indicate that we’re recording, so print(“recording…”) handles this for us and the two bits sandwiching it, cam.start_preview and cam.stop_preview allow us to see what we’re capturing.
Once done, the print(“saved”) tells users that it’s done.
We now need a dedicated preview button:
def preview_cam():
cam.start_preview()
time.sleep(10)
cam.stop_preview()
This starts a preview and then time.sleep(10) only has it last for ten seconds.
Telling the buttons what to do
Now we need to tell the buttons what they’re supposed to do when we actually press them. We already indicated what each pin means to Python, so now let’s tell it what happens when we make the physical connection.
preview.when_pressed = cam.start_preview
preview.when_released = cam.stop_preview
photo.when_pressed = capture
video.when_pressed = cap_vid
This links these commands with our definitions and the Pi Camera’s own library of code that we imported.
If you press Run, you should now see the results of the code so far for the physical buttons!
Building the User Interface
TKinter is a bit weird, it’s why I asked you to import both the whole thing and a specific section, as when I was building this script, this was what got it working.
root = tkinter.Tk()
root.title('Camera!')
root.geometry("300x300")
This creates the box and labels it on the top bar. It’ll create it at 300×300 pixels wide.
A = tkinter.Button(text = "preview", command = preview_cam)
B = tkinter.Button(text = "video", command = cap_vid)
C = tkinter.Button(text = "photo", command = capture)
This creates three individual buttons and then gives them text inside, as well as indicating what def they need to pull in.
A.pack(fill="both", expand=True, padx=20, pady=20)
B.pack(fill="both", expand=True, padx=20, pady=20)
C.pack(fill="both", expand=True, padx=20, pady=20)
Then we’ll expand the buttons out and make it look a little nicer.
root.mainloop()
Now we need to loop it around, so this just tells Python to reset it.
When you press Run now, you’ll find it’ll load up a window that we created! From here, it acts exactly the same as the physical buttons.
If you want to run this without loading Thonny (maybe between different Pi devices), you can go into Terminal and load it up from there.
For instance, I have it saved in Documents on the Pi, so I will type:
cd Documents
python3 cam3.py
Everything you have said to print will now appear there too.
Python Raspiberry Pi Camera Script
Download the File! (.zip)
Copy Paste (remember to keep the indents!)
#Import libraries
from gpiozero import Button
from picamera import PiCamera
from time import gmtime, strftime
import time
import tkinter
from tkinter import messagebox
#GPIO
cam = PiCamera()
preview = Button(17)
photo = Button(27)
video = Button(14)
#File output
output = “”
#capture photos
def capture():
global output
output = strftime(“/home/pi/Desktop/image-%d-%m %H:%M-%S.jpg”, gmtime())
cam.capture(output)
print(“saved”)
#capture video
def cap_vid():
global output
output = strftime(“/home/pi/Desktop/image-%d-%m %H:%M-%S.h264”, gmtime())
cam.start_preview()
cam.start_recording(output)
print(“recording…”)
cam.wait_recording(10)
cam.stop_recording()
cam.stop_preview()
print(“saved”)
#preview the camera
def preview_cam():
cam.start_preview()
time.sleep(10)
cam.stop_preview()
#Camera Button Controls
preview.when_pressed = cam.start_preview
preview.when_released = cam.stop_preview
photo.when_pressed = capture
video.when_pressed = cap_vid
#TKinter GUI
root = tkinter.Tk()
root.title(‘Camera!’)
root.geometry(“300×300”)
#TKinter Buttons
A = tkinter.Button(text = “preview”, command = preview_cam)
B = tkinter.Button(text = “video”, command = cap_vid)
C = tkinter.Button(text = “photo”, command = capture)
#TKinter Niceness
A.pack(fill=”both”, expand=True, padx=20, pady=20)
B.pack(fill=”both”, expand=True, padx=20, pady=20)
C.pack(fill=”both”, expand=True, padx=20, pady=20)
root.mainloop()
Connect the cable
Do not remove the plastic covering entirely.
I learnt this the hard way, it just makes it more difficult to pop the cable in afterwards. Gently lift up the plastic cover indicated on the Pi’s board with ‘camera’. Then, gently slot in the camera’s cable with the blue piece of plastic on the end of the cable facing towards the USB ports on the Pi’s board.
If you’re using another camera like I am, connect the ribbon cable to the back of the camera, with the blue tape facing away from the lens.
Take a Photo

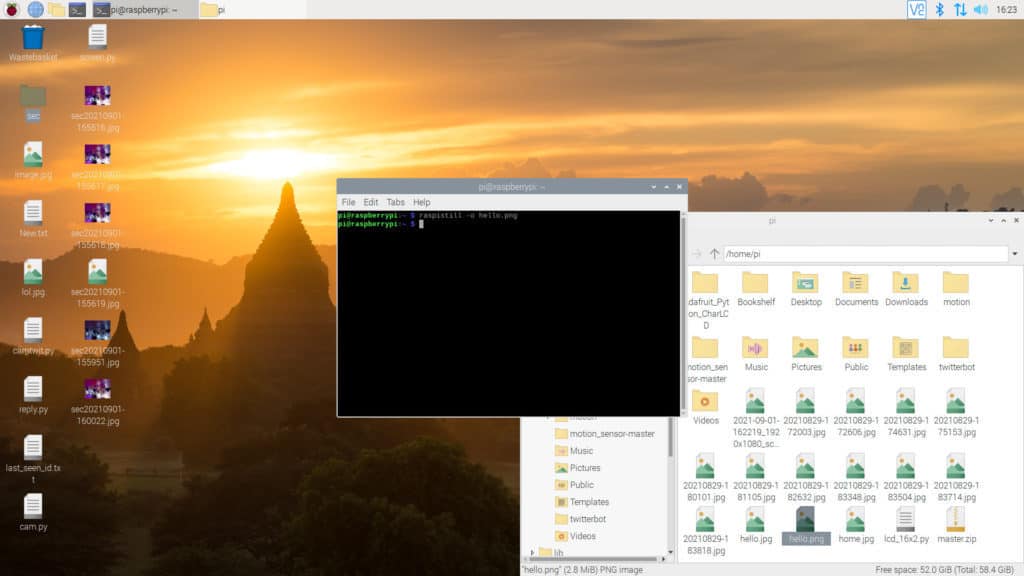
Open a Terminal window and we can now take a photo via the Command Line! Don’t worry, we’ll be making it a bit easier for you to take photos with the camera in a bit, so you won’t have to type this in entirely every time.
In the Terminal type:
raspistill -o /Desktop/photo.jpg
This will take a photo at the full resolution of your installed camera, but if you don’t want it to, you can set the height and width.
raspistill -o /Desktop/photo.jpg -w 1920 -h 1080 (you can set it to whatever you want!)
If your camera is upside down and you don’t want to edit it in post, be sure to add -vf and -hf for Vertical and Horizontal flips.
Remember that you can set the destination to anywhere, just know the path you want it to go to!
Take a Video

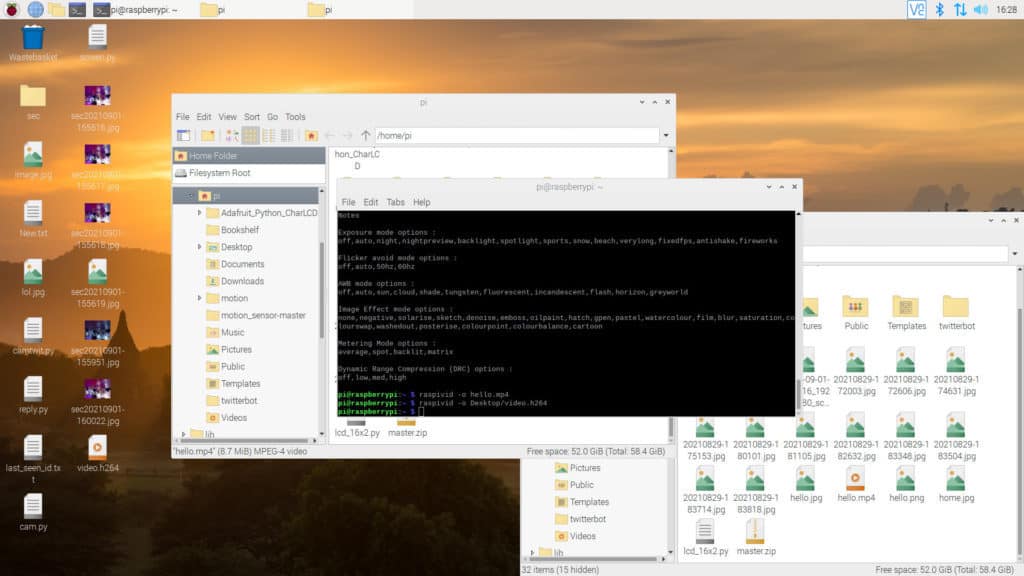
Taking a video works the same way as the photos, it just requires a few changes to the line in the terminal.
In the Terminal type:
raspivid -o /Desktop/vid.h264
Video by default on Raspberry Pi usually will record five seconds, we can change this by adding:
-t [time in milliseconds]
(No brackets needed on your end, just the milliseconds!)
You can also add the same resolution requirements as needed.
Now, just telling you how to build some Python code that you can find anywhere might be an easy way through, but we’re about making your life easy, not providing you with the same information.
So let’s build a physical and software-based camera that you can load up and use!
For the hardware, I’m using the Elegoo Ultimate Pack, which comes with a breadboard, wires, and a host of other stuff. It’s a bargain and even comes with some Arduino boards if you want to taste those waters as well.
The things we’d need out of it are:
- The breadboard
- Jumper cables (Male to Female)
- Buttons
Obviously, if you have your own kit, this will still work!
Python Pi Camera Script – Import
Python is a complex beast, but it’s pretty easy to see what it’s trying to do when you breathe and look closer.
Open Thonny (Raspberry > Programming > Thonny) and then start a new file by saving it (CTRL+S) and name it whatever you want. I named mine cam3.py.
We need to tell Python what we want to pull in to work with, otherwise, it’ll not understand what we need to do.
from gpiozero import Button from picamera import PiCamera from time import gmtime, strftime import time import tkinter from tkinter import messagebox
What we’re asking Python to bring in is to look at the GPIO pins via gpiozero and then asking it to only really focus on Button functions. Of course, we need to work with the Pi Camera itself, but we need the commands.
While we’re importing time, we need to also ask it to import from time to focus on gmtime and strftime.
Then the last one is Tkinter, which we’ll have to install separately in some cases. If you’re getting errors when working on things and it revolves around no module for Tkinter, open a terminal and type in:
% sudo apt-get install python3-tk
Tkinter is the part of Python that generates a user interface for those of us without hardware.
Import Tkinter with both import tkinter and from tkinter import messagebox. This will allow us to work with pop-up boxes.
Python Camera Script – Assigning Buttons and Files
If you’ve followed Raspberry Pi’s own stop motion tutorial, this will look very familiar, but what we’re about to do is tell Python where we’ve plugged the pins into buttons and what button is what. We’ll also be naming the camera in the script.
I’ve written it out like so:
cam = PiCamera() preview = Button(17) photo = Button(27) video = Button(14)
They might look random, but when you begin to piece it together, the wires will be very easy to match up along the pins.
Then we need to tell Python not to assign any name to our Photo or Video output, as we’ll be indicating this later down the line.
output = ""
Wire Up the Raspberry Pi
For this we’ll need some jumper cables that are male to female (you’ll get why they’re called that) and plug in the female ends to the pins directly on the Pi. The other side will go to the buttons on the breadboard.
Make sure your buttons are facing with their legs in a vertical way if you were looking straight down at them.
Make sure you match the wires so that Ground is mostly blacks or greys and the wires going out to each button is a different colour so you can remember what is what.
With the line of holes left in a vertical line on the breadboard, plug in a ground wire to each of the lower legs and then your action wires to the one above it.
The pins that we want to use on the Pi are as follows:
17, 27, 14 – Activity Wires
You can connect the Ground wires wherever there’s a spare ground pin, but try to aim to keep them clumped together. (It looks neater!)


